You have tried everything. But your Mac is still not performing optimally. One thing hits your mind: you had a Windows PC that behaved similarly. All you needed was to defragment the disk, which should potentially have the same effect on your Mac. As a Windows PC user, you might have relied on disk defragmentation to optimize your computer’s performance. After all, it makes the PC run much faster, thanks to the Windows OS’s built-in defragment software.
What if you are using a Mac? Defragmenting a Mac’s disk is a great way to speed it up and enhance performance. However, the situation is more complicated. The latest macOS versions are designed to solve the problem automatically; you do not need to defragment. In this article, we will explore the idea of defragmenting your Mac, what you should do, if there is a way to manually defragment your Mac’s hard drive, and when to consider it.
What does disk defragmentation do?
Disk defragmentation optimizes a computer’s performance by reorganizing the data stored on the drive. The process aims to group related bits of data, reducing the time required for loading files and applications. This significantly improves the speed of a sluggish system.
For context, when you save files on your Windows PC, the data is allocated wherever space is available on the drive. If a file exceeds the available space in a single area, it gets fragmented and stored across multiple locations.
This will result in your computer slowing down as it seeks scattered data fragments needed to open files or run programs. Disk defragmentation effectively consolidates these scattered data bits, streamlining access by bringing them closer together.
Similarly, Mac defragmentation works by organizing related bits of data on the hard drive, allowing faster loading of files and programs. It restructures the file arrangement on the hard drive, simplifying accessibility for the computer.
Disk defragmentation on Windows and macOS
Windows operating systems integrate built-in defragmentation software. For instance, Windows 10, 8, and 7 automatically perform defragmentation tasks weekly, often labeled “Optimize Disk” in recent OS releases.
Users can adjust the frequency of these defragmentation tasks according to their preferences. However, this is not the case with Macs, as Apple has never included defragmentation software in macOS.
So why should you not defragment your Mac, you may ask? There are several reasons why Macs do not offer a defragment function. First, macOS versions later than 10.2 have built-in utilities that manage fragmented files on the drive.
This eliminates the necessity of defragmenting MacBooks manually. Besides, newer macOS versions do not support software that could defragment a Mac, except for these built-in utilities that run automatically.
Why you should never defragment a Mac’s SSD
Attempting to defragment a solid-state drive (SSD) on a newer Mac is not advisable. It is considered unnecessary and potentially harmful. SSDs operate differently from traditional hard disk drives (HDDs), including with built-in automatic maintenance processes.
They employ flash memory with a limited lifespan due to their read and write cycles. On the other hand, disk defragmentation involves reading data from one place and writing it to another.
When applied to an SSD, this process results in thousands of write operations, accelerating the drive’s degradation and reducing its lifespan. Defragmenting an SSD may lead to increased wear and tear, which is detrimental to its longevity and performance.
Understanding the intricacies of disk defragmentation remains crucial for optimizing computer performance. While Windows systems offer automated defragmentation tools, macOS systems integrate utilities that manage fragmented files, minimizing the need for manual intervention.
Summarily:
- Unlike Windows PCs, Macs do not usually need disk fragmentation
- Since the launch of OS X 10.2, modern Macs have been automatically defragmenting files
- Disk defragmentation can potentially harm a hard drive due to the wear caused by moving files around.
- Macs equipped with solid-state drives (SSDs) do not require defragmentation.
Defragmenting your Mac only becomes essential under specific circumstances, such as:
- If your Mac is equipped with a Hard Drive
- Your available storage is diminishing.
- You frequently save notably large files, exceeding 1 GB in size.
How to optimize your Mac in other ways
Despite Macs’ robust features, they still encounter performance-related issues over time. Luckily, you can take a few steps and measures to return it to normal functioning.
Instead of defragmenting the hard drive, macOS provides utilities like Disk Utility and Apple Diagnostics to address some of these issues. Here are some alternative methods you can opt for to optimize your Mac’s performance:
1. Manage startup items
One of the reasons your iMac is running slow is due to numerous apps and system services running in the background and launching at login. These items may consume too many resources, potentially slowing down the process.
You need to manage these items and improve startup performance to get your Mac back to normal. Here is how to go about it:
- Go to Finder
- Select Applications
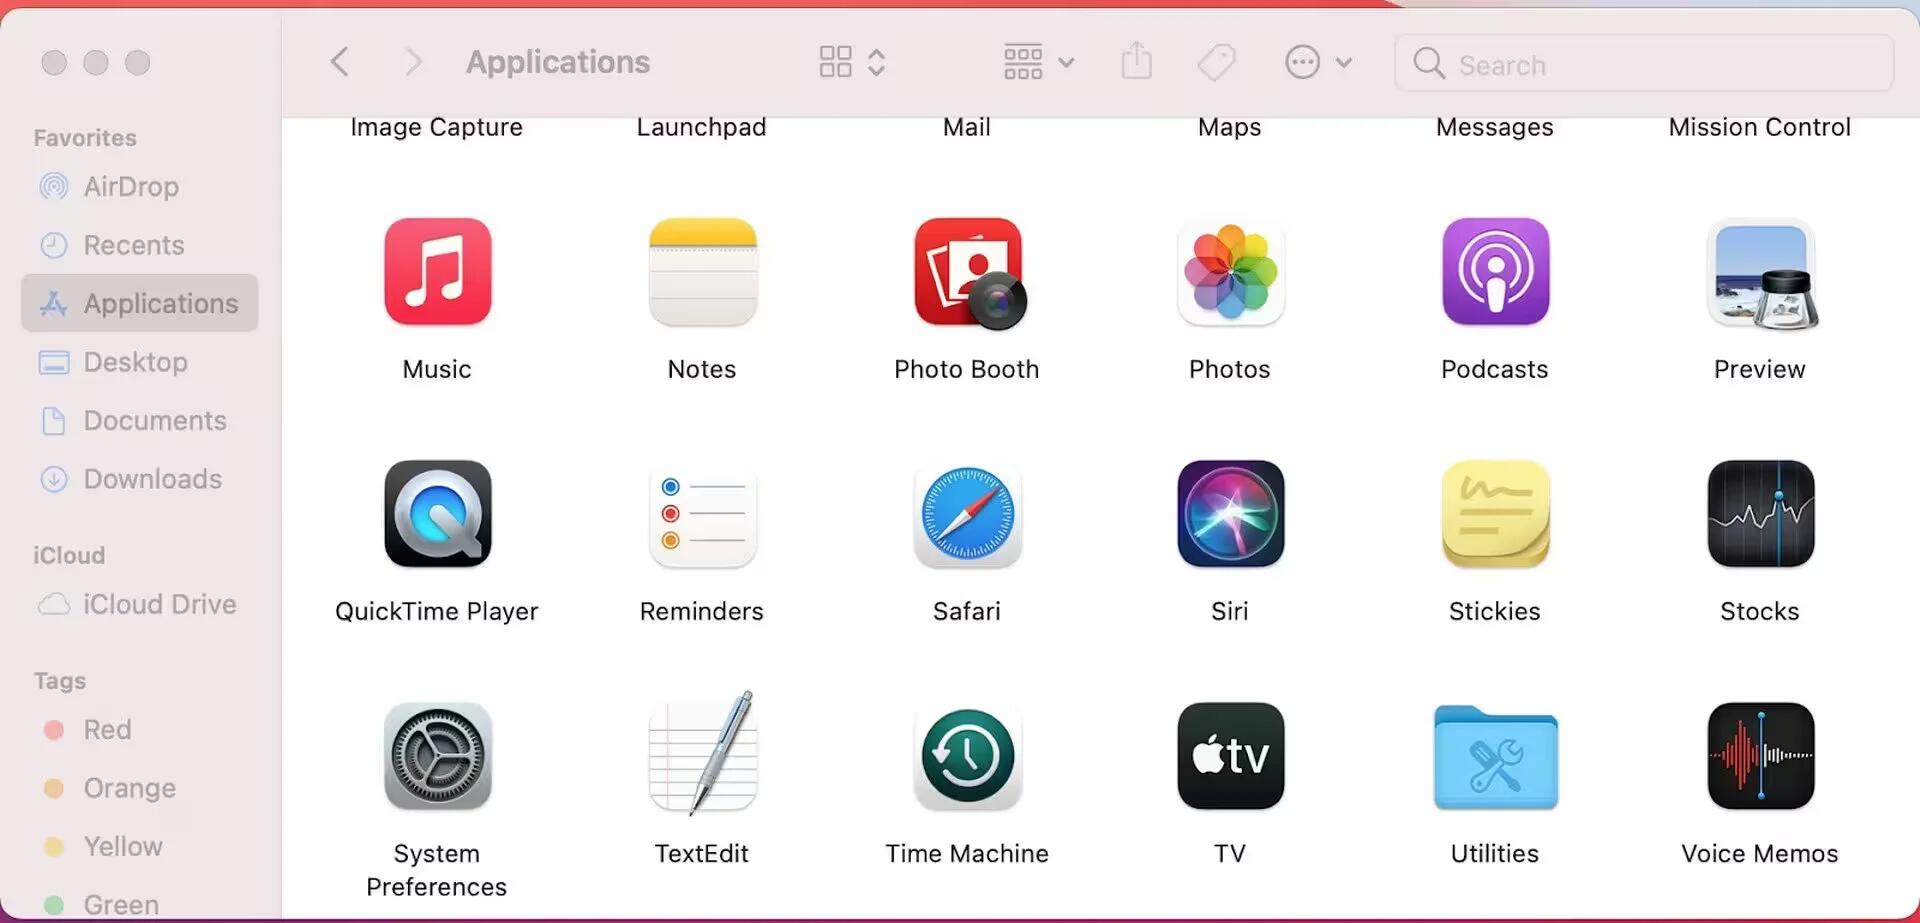
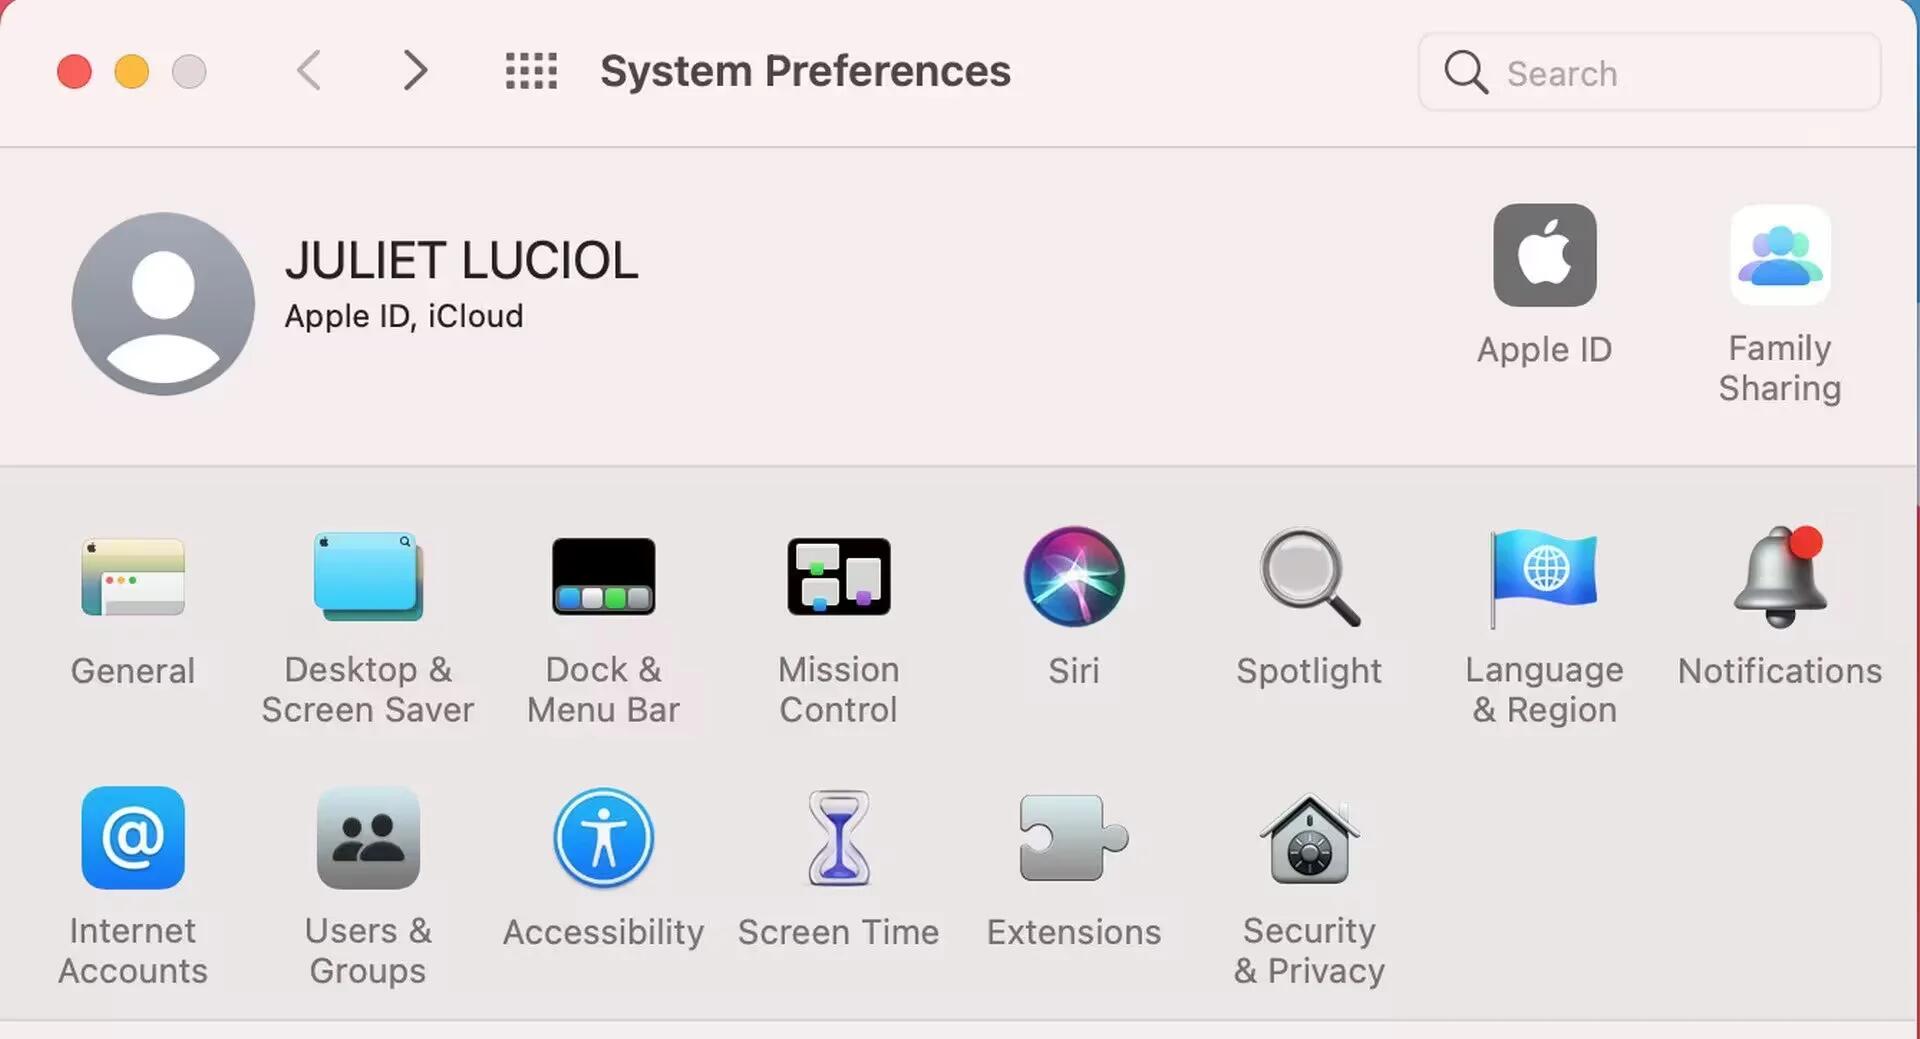
- Go to System Preferences
- Click on Users & Groups
- Proceed to click Login Items on the right.
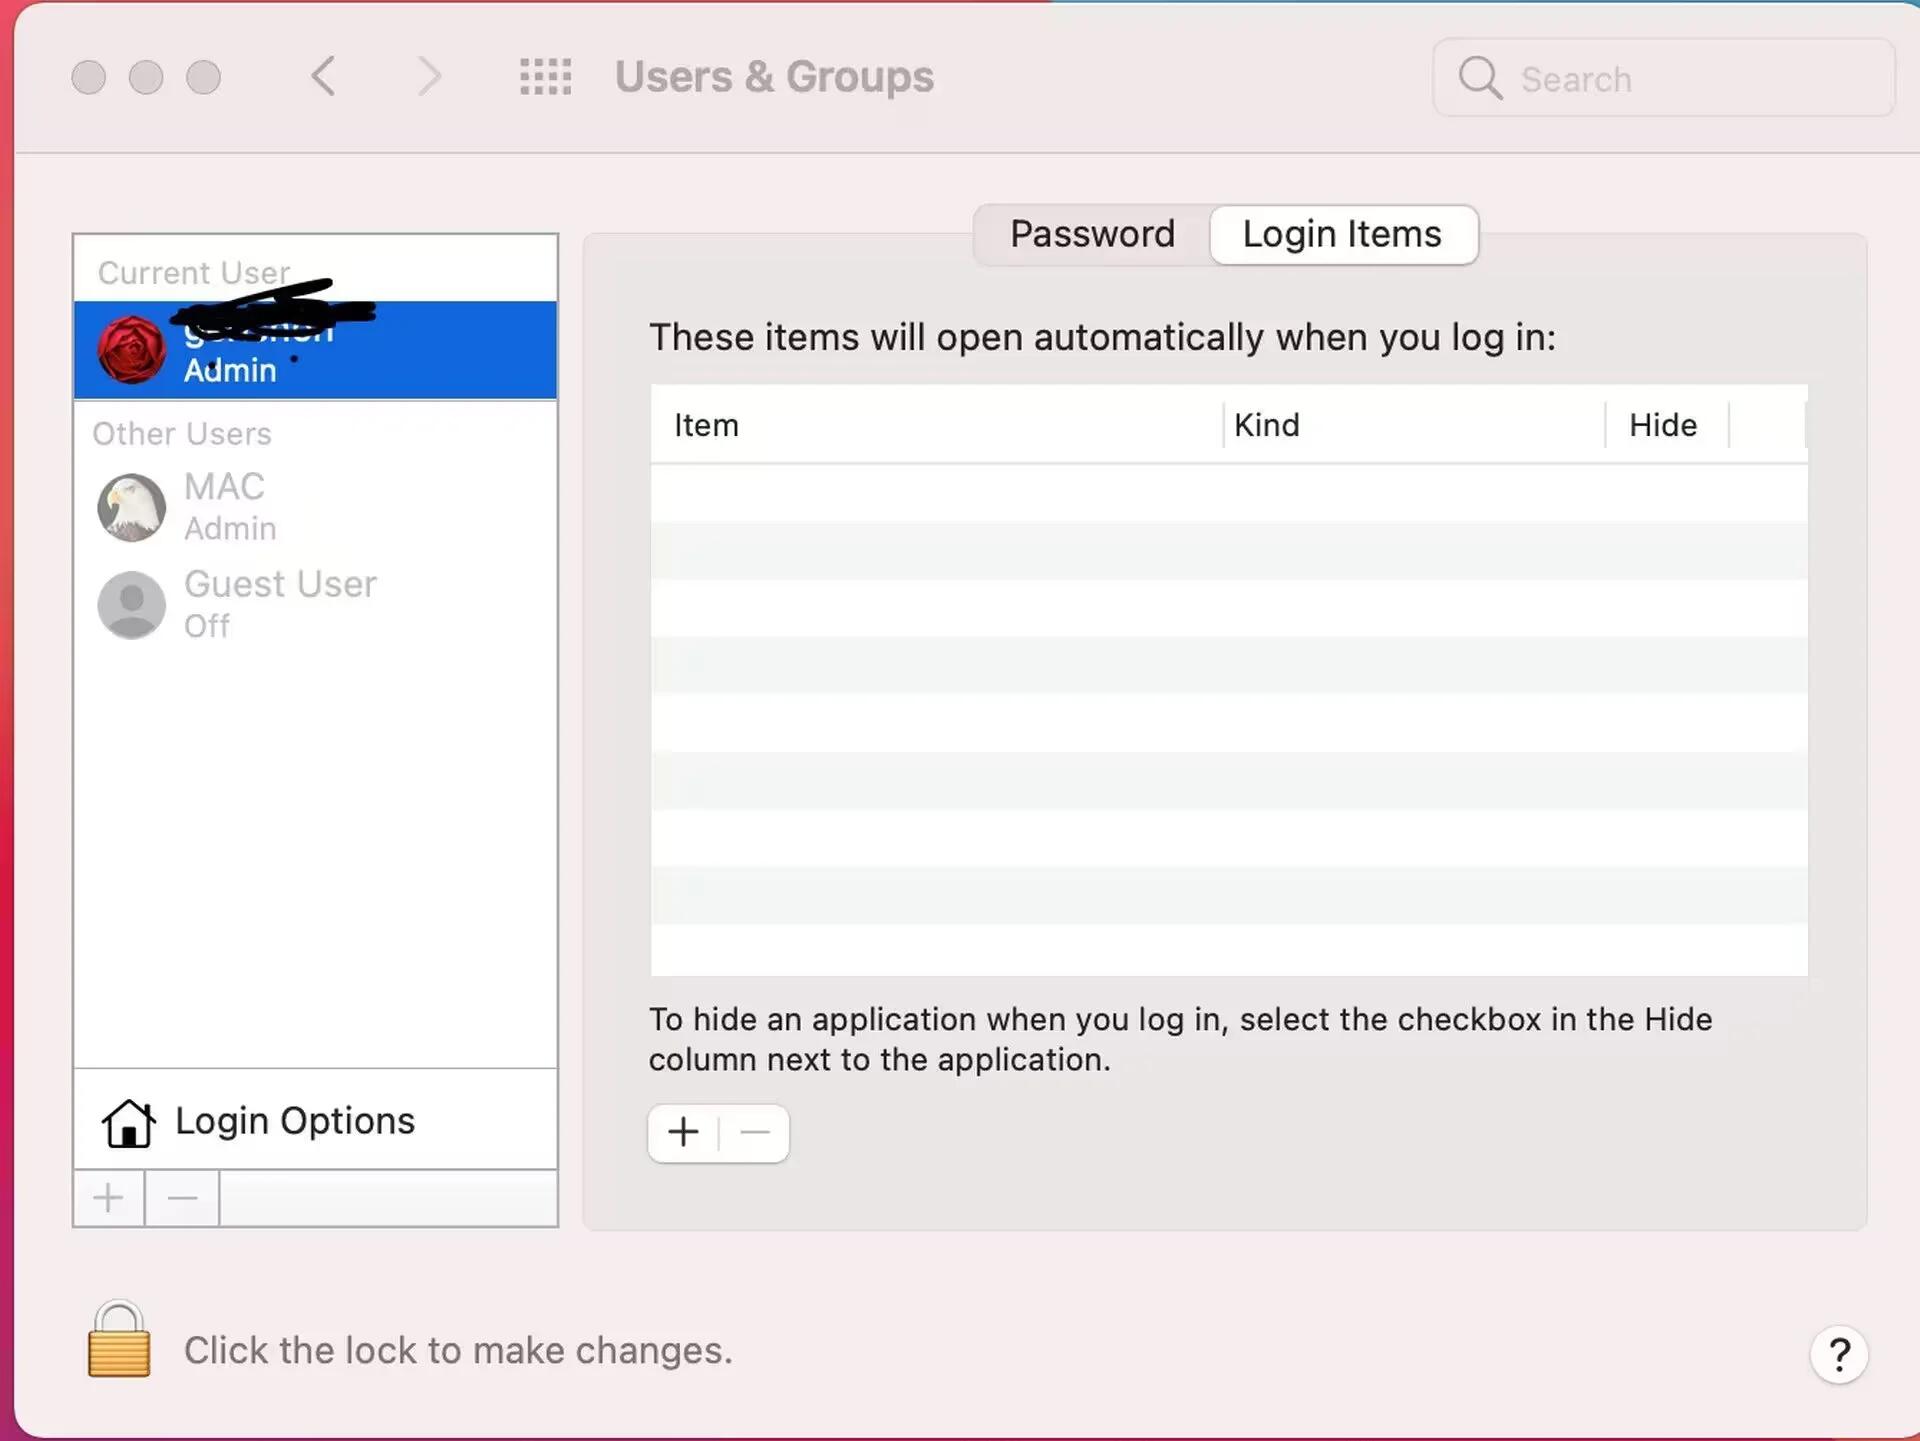
From here, create a list of the login items to remove, then click the Remove button with the “-” sign.
2. Optimize your storage
Your Mac requires sufficient free space for optimal performance. Ideally, your Mac needs to reserve at least 10-20% of its overall storage capacity. That is why you should always take extra steps to ensure the storage limit is not exceeded. First:
- Find and delete large files, such as photos and videos.
- Clear unnecessary files from the Downloads folder
- Ensure that you empty the Trash regularly.
MacOS also has a built-in feature that allows you to optimize storage. Here are the steps to follow:
- Select the Apple menu
- Go to About This Mac
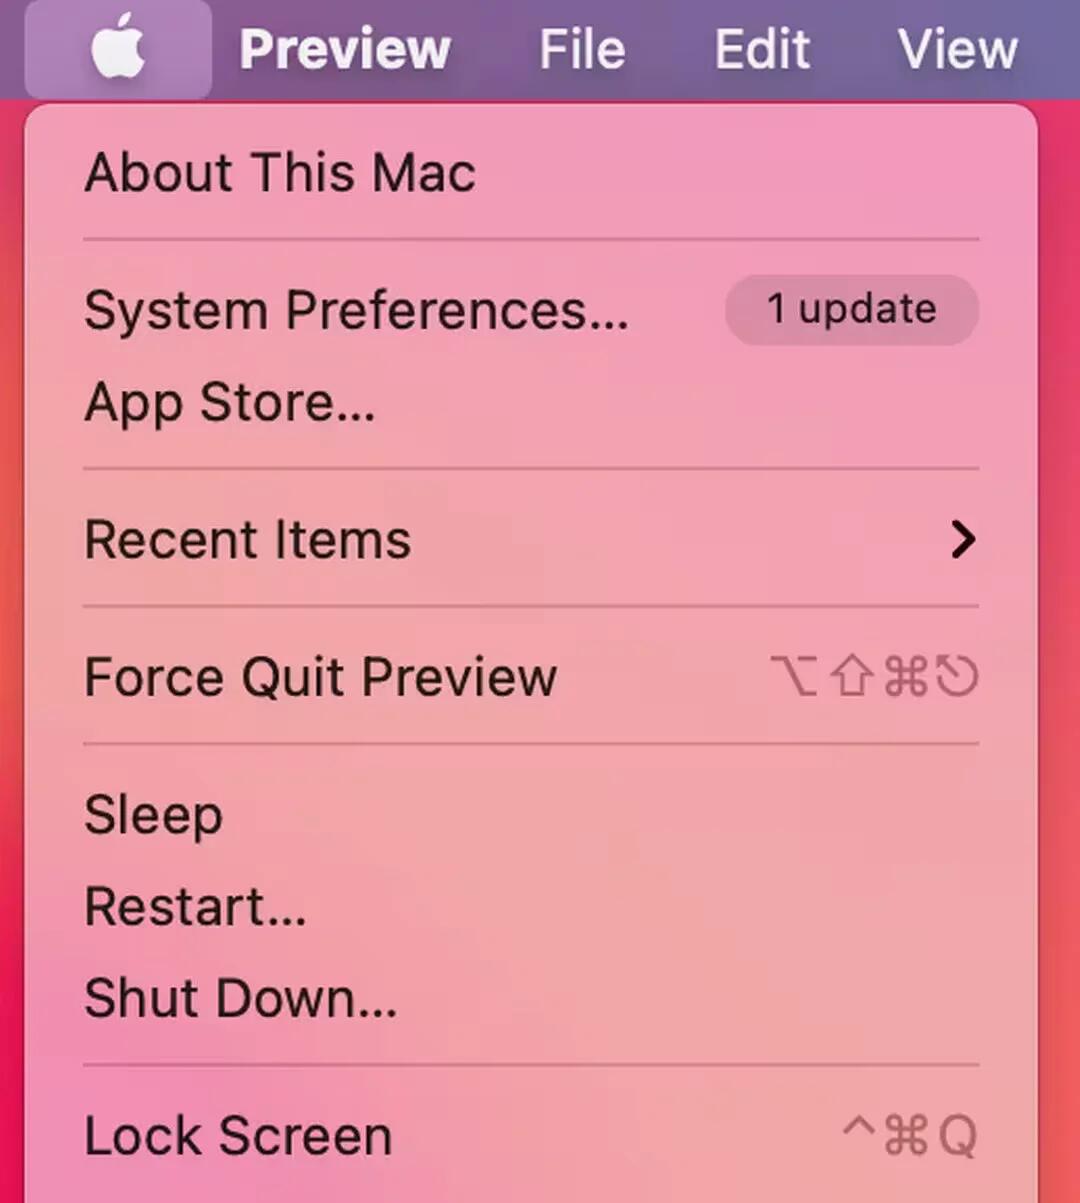
- Click Storage in the window that appears.
- Click Manage

- Select Optimize Storage

You can view all the recommendations here and optimize storage on your Mac.
3. Update your macOS
Old macOS has vulnerabilities and glitches that may slow down your Mac’s performance. Updating means accessing new features that enhance functionality. Luckily for Mac users, Apple releases many new features with each macOS update.
This may include new apps and tools focusing on streamlining and optimizing performance, often resulting in enhanced speed for iMacs, MacBooks, and Mac Pros. Remember that the macOS version you can upgrade depends on when your Mac was released.
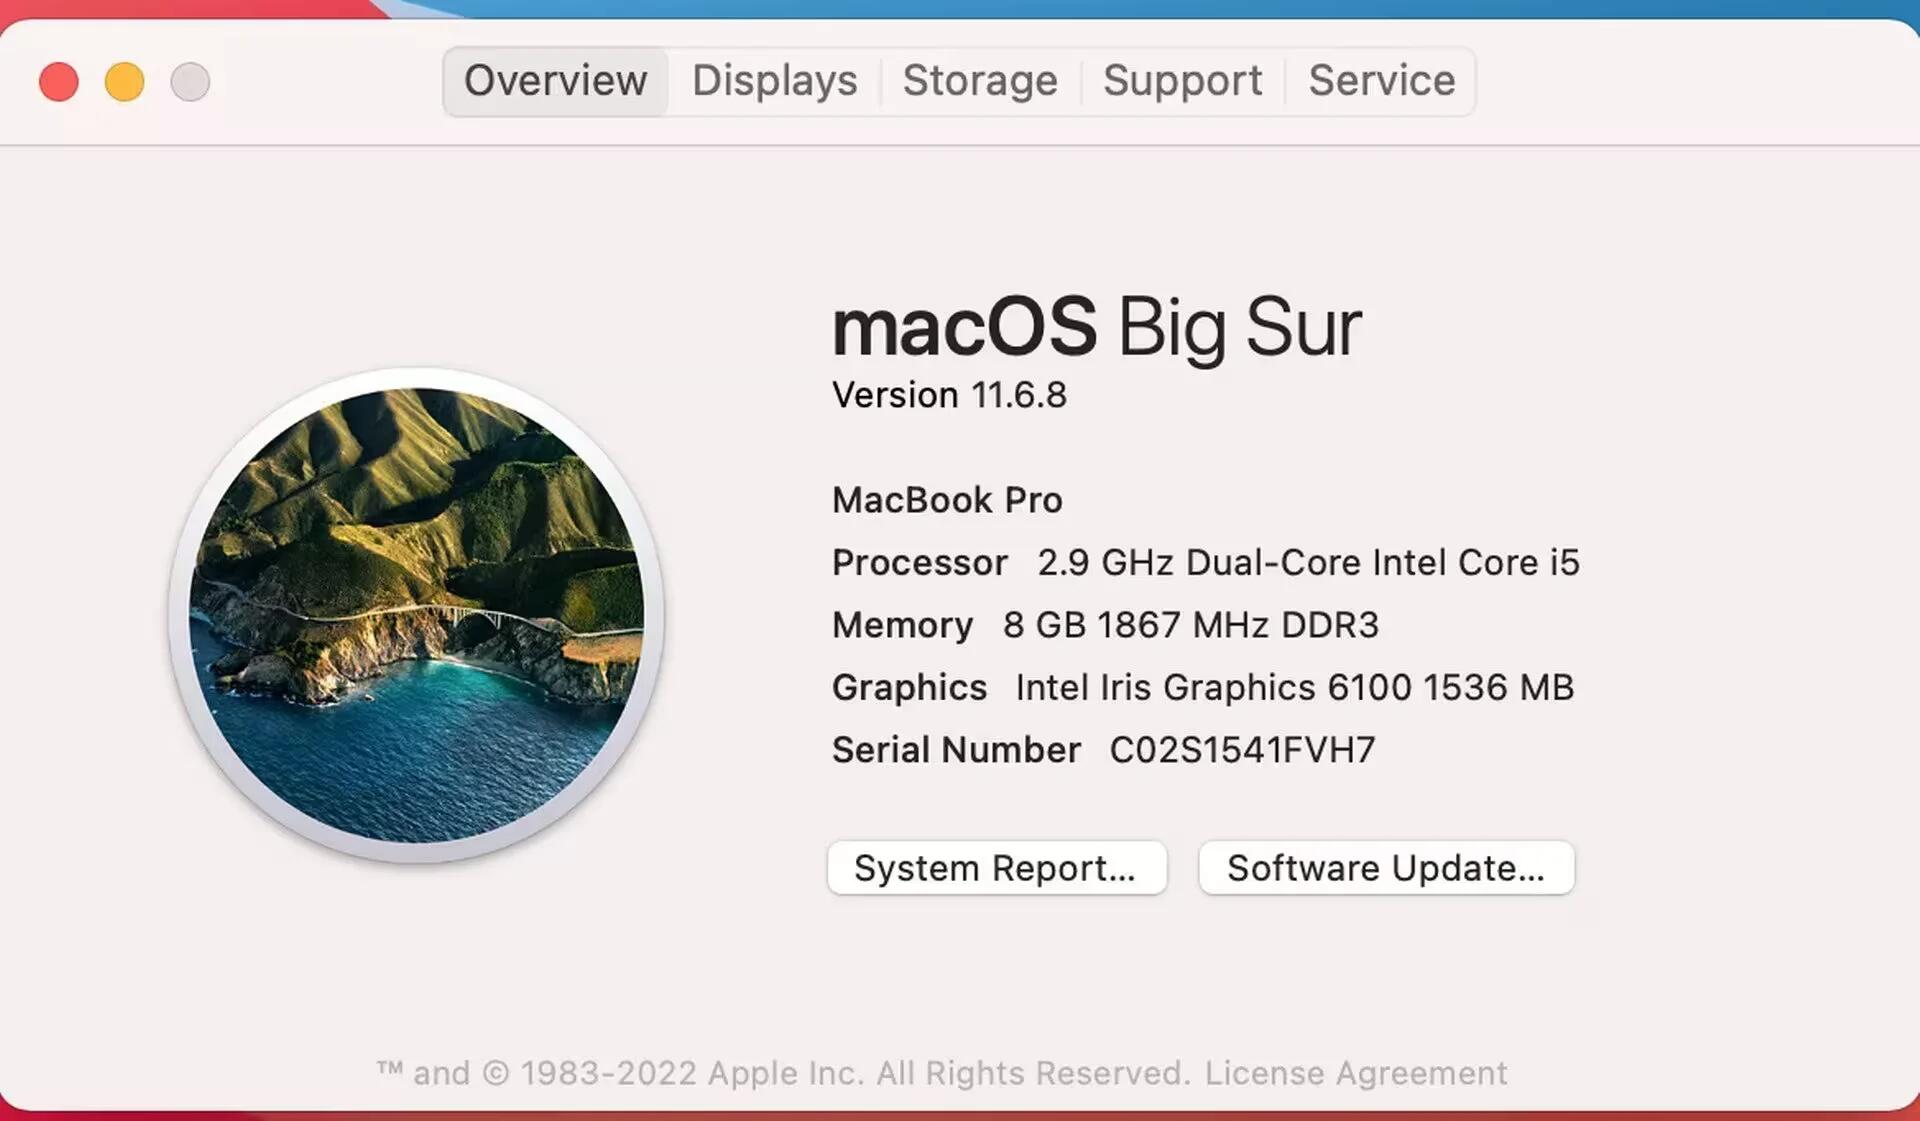
Here is how to update your macOS Big Sur:
- Click the Apple menu
- Choose About This Mac

- Go to the Overview tab in the window that appears

- Click on the Software Update button.
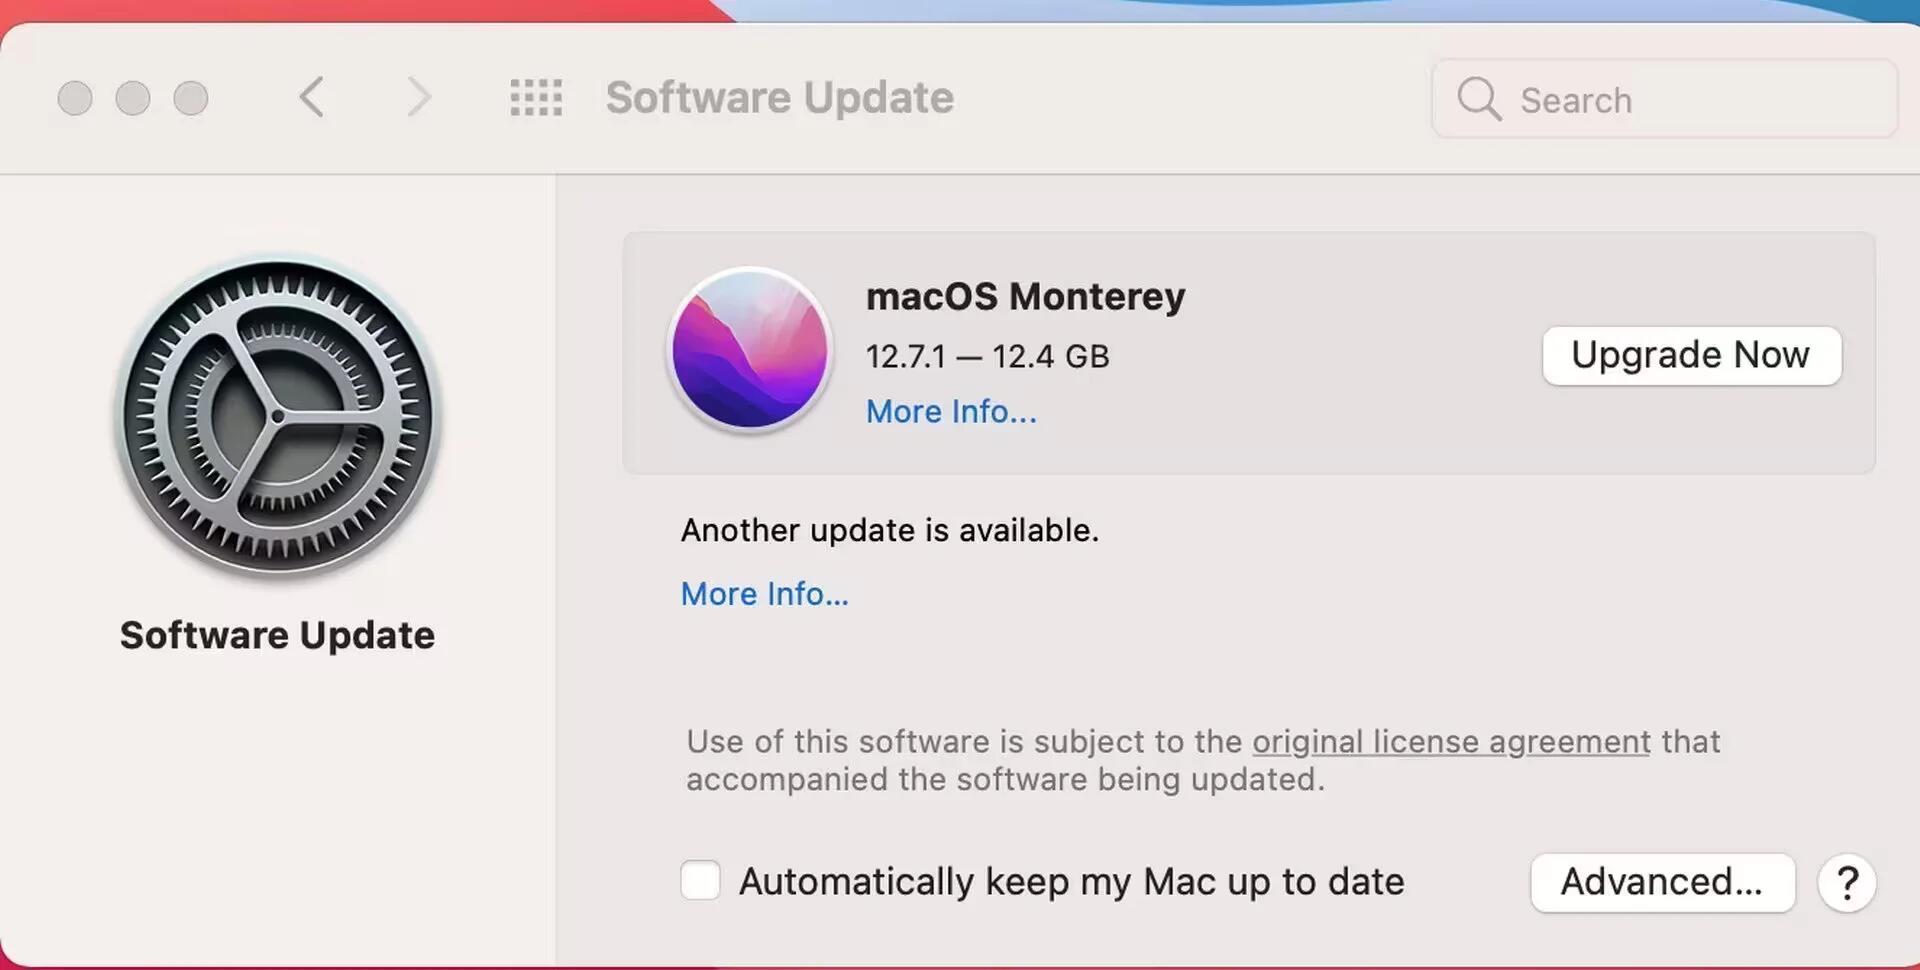
This opens the Software Update system preference, where that macOS Monterey update will appear. You can update from here to the Big Sur version you want.
4. Uninstall unused apps
Apps you no longer use eat valuable space on your Mac, causing it to underperform. Removing them is an effective way to free up space and improve Mac performance. There are various options to consider. The most common one is resorting to the Trash bin.
Here is what you need to do:
- Open Finder
- Go to Applications

- Select the app you want to delete
- Press Command + Delete
- Proceed to empty the Trash by clicking the Empty button.
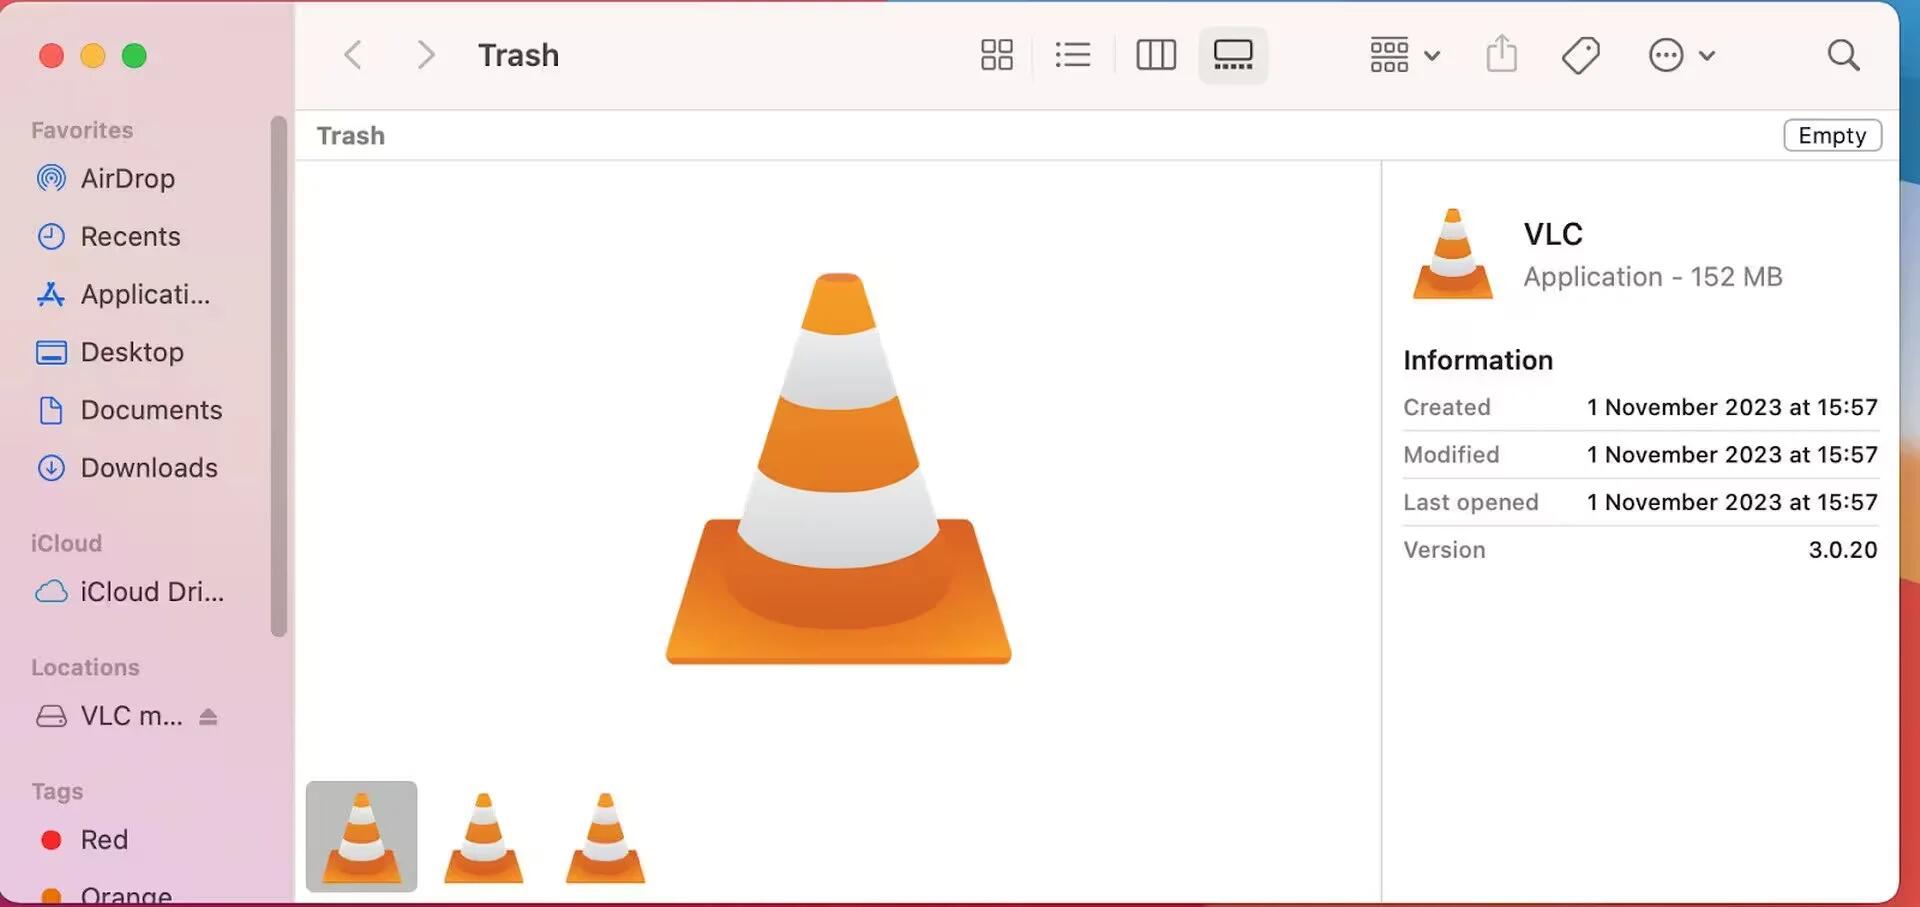
Another option is to use the Launchpad.
- Open Launchpad in the Dock or from your Applications folder
- Occasionally, you may not see the app in Launchpad. No need to worry; type its name in the search field at the top of Launchpad.
- Press the Option key and hold it
- Alternatively, click and hold the app until it jiggles, then click the Delete button.
5. Free up RAM
Optimizing your RAM (Random Access Memory) is necessary for efficient app usage on your Mac. If your Mac has enough free RAM, you will enjoy smooth functionality without encountering slow performance issues.
Here is how to free up RAM manually on your Mac:
- Restart your Mac more often
- Remove login items
- Quit any unnecessary processes in the Activity Monitor.
- Clear cache files to optimize system performance.
Final Thoughts
Defragmenting your Mac is not always necessary or advisable. Modern Mac devices excel at maintaining a tidy file system on their own. This alone contributes significantly to a well-maintained and organized file structure on your Mac.
Remember, you can still optimize your Mac’s performance without defragmenting the disk. The above-shared measures and strategies can help you maintain a smooth and optimized Mac experience without frequent or unnecessary defragmentation.
