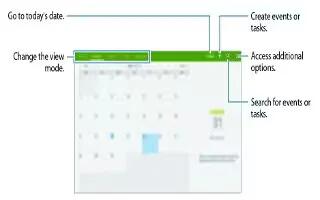
Learn how to use S Planner on your Samsung Galaxy Tab S. Use this app to manage events and tasks.

- Tap S Planner on the Apps screen. Tap Menu icon and use the following:
- Go to: Move to a specific date.
- Delete: Delete events or tasks.
- Sync: Sync events and tasks with your accounts.
- Calendars: Select the calendars to display.
- Settings: Change settings for S Planner.
Creating events or tasks

- Tap S Planner on the Apps screen.
- Tap + icon. Alternatively, select a date with no events or tasks in it and tap the date again. If the date already has saved events or tasks in it, tap the date and tap + icon.
- Select either event or task and enter details.
- Event: Set a start and end date for an event. You can set an optional repeat setting.
- Task: Add a task to do on a specific date. You can set an optional priority setting.
- Tap Done to save the event or task.
Syncing events and tasks with your accounts
- Tap S Planner on the Apps screen.
- To sync events and tasks with your accounts, tap Menu icon > Sync.
- To add accounts to sync with, tap Menu icon > Calendars > Add account. Then, select an account to sync with and sign in. When an account is added, a green circle is displayed next to the account name.
- To change an accounts syncing option, open the Apps screen, tap Settings > General > Accounts, and then select an account service.
Deleting events or tasks
- Tap S Planner on the Apps screen.
- To delete events or tasks, tap Menu icon > Delete, select the events or tasks, and then tap Done > OK.
- To delete an event or task while viewing it, tap Menu icon > Delete > OK.
- To mark tasks as completed, tap a date that has tasks in it and tick completed tasks.
Sharing events or tasks
- Tap S Planner on the Apps screen.
- To share an event or task while viewing it, tap Menu icon > Share via, and then select a sharing method.
Note
This guide will work on all Samsung Galaxy Tab S’s; including Samsung Galaxy Tab S 8.4 and Samsung Galaxy Tab S 10.5.
