Learn how to use Wi-Fi on your Sony Xperia Z. You can access the Internet wirelessly from your device using Wi-Fi technology. This way you can browse the web and share media files over the same Wi-Fi network with other DLNA Certified devices, for example, TVs and computers.
If your company or organization has a virtual private network (VPN), you can connect to this network using your device. You can use a VPN to access intranets and other internal services at your company.
Before using Wi-Fi
To browse the Internet using a Wi-Fi connection, you need to search for and connect to an available Wi-Fi network, and then open the Internet browser. The signal strength of the Wi-Fi network may differ depending on your device’s location. Move closer to the Wi-Fi access point to increase the signal strength.
How to turn on Wi-Fi on Sony Xperia Z
- From your Home screen, tap Apps icon.
- Find and tap Settings.
- Drag the slider beside Wi-Fi to the right to turn on the Wi-Fi function.
Note: It may take a few seconds before Wi-Fi is enabled.
How to connect to a Wi-Fi network on Sony Xperia Z
- From the Home screen, tap Apps icon.
- Find and tap Settings.
- Make sure that the Wi-Fi function is on. Tap Wi-Fi.
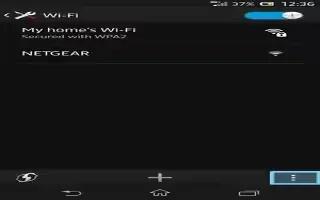
- Available Wi-Fi networks are displayed. The available networks may be open or secured. Open networks are indicated by Wi-Fi icon and secured networks are indicated by Wi-Fi icon with lock on it next to the Wi-Fi network name.
- Tap a Wi-Fi network to connect to it. If you are trying to connect to a secure network, you are asked to enter a password. Wi-Fi icon is displayed in the status bar once you are connected.
Note
- Your device remembers Wi-Fi networks you connect to. The next time you come within reach of a previously connected Wi-Fi network, your device automatically connects to it.
- In some locations, open Wi-Fi networks require you to log in to a web page before you can get access to the network. Contact the relevant Wi-Fi network administrator for more information.
How to connect to another Wi-Fi network on Sony Xperia Z
- From your Home screen, tap Apps icon.
- Find and tap Settings > Wi-Fi. Detected Wi-Fi networks are displayed.
- Tap another Wi-Fi network to connect to it.
How to scan for Wi-Fi networks manually on Sony Xperia Z
- From your Home screen, tap Apps icon.
- Find and tap Settings > Wi-Fi.
- Press Menu icon, then tap Scan.
- To connect to a Wi-Fi network, tap the network name.
How to add a Wi-Fi network manually on Sony Xperia Z
- Make sure that Wi-Fi is turned on.
- From the Home screen, tap Apps icon.
- Find and tap Settings > Wi-Fi.
- Tap + add icon.
- Enter the Network SSID for the network.
- Tap the Security field to select a security type.
- If required, enter a password.
- Tap Save.
Note: Wi-Fi network name is indicated as SSID, ESSID, Access Point, etc. Contact your Wi-Fi network administrator to get the Network SSID name and password.
