Regular defragmentation keeps the system performance consistent. But you cannot sit at your PC through this entire process. What is also irritating is that defragmentation needs to be manually activated if there are several hard disks.
The graphical interface of Windows’s defragmenter does not provide the option to process several drives one after the other, at least under XP. What a lot of people don’t know is that Windows has an additional command line tool called ‘defrag.exe’ that is suitable for batch processing as well. You can use it to automate the defragmentation of several drives. If you operate a system with drives C, D and E for instance, enter the following in Notepad:
@echo off
defrag.exe -f c
defrag.exe -f d
defrag.exe -f e
Save the file as ‘defrag.cmd’. If you are using other drive names or more drives, change the file accordingly. Double click this file to defragment all drives continuously. You can also schedule this to run at a specified time using Windows Scheduled Task. However you need to be logged in with administrator rights for running the file. The used parameter ‘-f’ carries out the defragmentation even if the hard disk has less than 10 percent of free space, without pausing for an error message. But the process takes too long in that case. What you can do is delete the large files that are no longer required.
Vista and Windows 7 regulate defragmentation automatically on the basis of a schedule. Irrespective of that, you can either use the batch processing operation via ‘defrag.exe’ or even select several drives simultaneously with the graphical interface.
There are two methods in both Windows Vista and Windows 7 to open the Defragment UI. You can either open the disk defragment from Start Menu > Accessories > System Tools > Disk Defragmenter or
- Right click a drive entry in the Explorer of Windows Vista / Windows 7
- Select Properties in the context menu
- In the Properties dialog box that pops up, go to ‘Tools’ tab
- Now, click the ‘Defragment now’ button


Disk Defragmenter tool can be found on Accessories > System Tools. (Left: Windows Vista, Right: Windows 7)

Right click a drive entry in the Explorer, and select Properties


In the Properties dialog box that pops up, go to ‘Tools’ tab and click the ‘Defragment now’ button (Left: Windows Vista, Right: Windows 7)
To automate defragmentation in Windows Vista through graphical interface follow the below steps
In the Disk Defragmenter Window
- Click the ‘Select Volumes’ button
- Now activate several drives for defragmentation or ‘Select all data carriers’
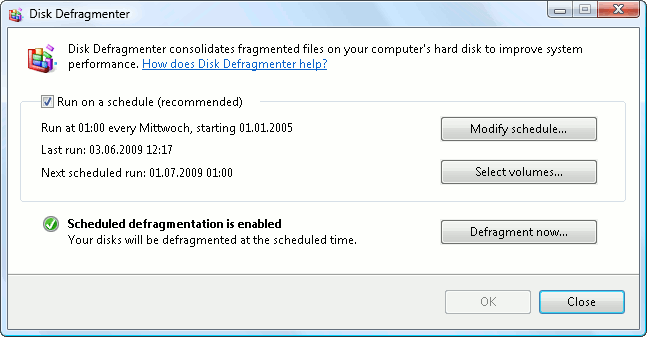
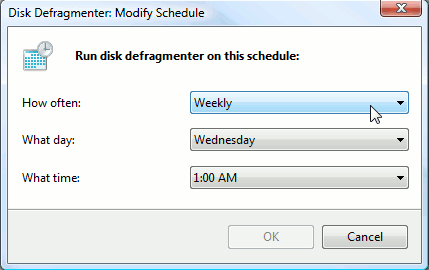
- You can also automate the Defragmentation, by selecting Modify schedule in the Disk Defragmenter and change the timings
- To defragment immediately, click the Defragment now button in the Disk Defragmenter window

Windows Vista Disk Defragmenter

In Windows Vista Disk Defragmenter, Select the Volume to Defragment

Modify the Schedule of the Disk Defragmenter
To automate defragmentation in Windows 7 through graphical interface follow the below steps
In the Disk Defragmenter Window
- Keep the [ctrl] key pressed and then select the desired drives by clicking the entries one after the other
- You can also change the schedule of the Disk Defragmenter by clicking the

Windows 7 Disk Defragmenter

Windows 7 Disk Defragmenter Automatic Schedule Options

Windows 7 Disk Defragmenter Select disks for Schedule
I hope this article is useful to you. Please leave your comments below.
